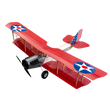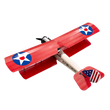


The FT Jenny XL is an iconic fast build representation of the classic Curtis JN-4 “Jenny”. This large 58 inch biplane was designed by Dave Jester to build fast and fly slow! In as little as three hours, you can go from the build table to the skies and experience all the thrills of classic barnstorming flight.
The FT Jenny XL is a 4 channel aircraft, which gives you aileron, rudder, elevator, and throttle control. This large scale aircraft flies so slow, it can easily be enjoyed in a large back yard, Park, or soccer field.
The FT Jenny XL was also a special project as a special surprise for our wonderful team leader, backbone of Flite Test, and the beloved wife of Josh Bixler. For over 10 years, Jen Bixler has requested this very airplane to be added into the FT hanger for not only her love of vintage aviation, but of course it's awesome name! Dave Jester and Josh Bixler collaborated together to create a gentle larger trainer version of the Jenny to allow Jen and other new pilots to experience the wonders of flight in style.
If you’re ready to take to the skies, grab your scarf and goggles and of course a hot glue gun. I hope that this awesome little plane brings as many smiles and memories for you as it has for us.
If your passion is scale, you can easily upgrade this aircraft with optional 3D printed engine halves or the entire cowling! We even have you covered (literally) with optional decals to take you from military to flying circus! One of our favorite features of the Jenny XL is the included flying wires that not only add amazing strength, but also complete the scale look of the Jenny.
To build the Jenny XL, simply use the build video of the FT Mighty Mini Jenny along with the Jenny XL Build Supplemental Article. The Jenny XL build is very similar to the FT Mighty Mini Jenny and the build supplemental article shows the changes and additional steps needed to complete your project.
-----
Are you just starting out in Radio Controlled Planes? No problem. We got you covered! We're a community that loves sharing our passion for flight and we've got the knowledge to guide you every step of the way. So why not jump right in? Visit our Beginner Section & let's start this journey together.
Specifications
- Weight with Battery: 2.7lb
- Center of Gravity: 2.2” from top leading edge
- Control Surface Throws: 12 to 16 degree deflection
- Wingspan: 58.5" (1493.52 mm)
- Length: 41" (1041mm)
Recommended Electronics
- Motor: FT 2814 1100kv motor
- Prop: 12x4.5 CCW Propeller
- ESC: FT 40 Amp ESC
- Battery: 3300 mAh 3 cell
- Servos: (4) 9 gram servos
Package Includes
Note: Kit includes airframe only
- 4) Lasercut Maker Foam Sheet
- 4) Swappable Control Horn
- 1) Velcro
- 4) Zip Tie
- 2) Thick Landing Gear Wire
- 4) 16" Pushrod Wire
- 2) 4.3" Wheel
- 2) 3.1mm Wheel Adapter
- 1) 24" Nylon 1mm Cord
- 1/8" Plywood Jenny XL Kit
-
FT Jenny XL
Love it, I am a vintage airplane lover and this is just awesome I ordered mine with the radiator and dummy motor and along with the fly wires it has pure good looks I own the FT Scout XL and the FT Triplane XL and the Jenny XL fits right in with the old school vintage looks. The Jenny XL is super slow and looks amazing in the sky if you are thinking about purchasing this airplane you will love it too. Shanon Rc OutLaw approved.
-
Jenny XL assembly instuctions
A concern or two has shown themselves regarding the assembly instructions of a recently purchased FliteTest (FT) Jenny XL. Trying to follow the “Mini-Jenny” video and the Jenny XL Supplemental instructions unfortunately leads to my concerns of lack of stepwise kit specific instructions, assembly and part identification clarity, and placement.
FT has done a great job of creating and releasing assembly instructions of their product via YouTube (in many ways I like it versus written instructions). However, in the case of the Jenny XL, the builder is told to follow the “Mini-Jenny” YouTube video assembly steps. I found this video falls short when trying to translate from the Mini-Jenny to Jenny XL. There are too many differences in parts and their assembly. I think that was noticed by FT when FT released its Jenny XL Supplemental instructions to fill in a gap of assembly information. Those instructions also need to be reviewed.
I recommend FT eliminates the Jenny XL Supplemental assembly instructions and the Mini-Jenny references and create a unique, standalone FT Jenny XL assembly YouTube video which FT has done so excellently in the past on many of their airborne kit products.
-
Part- 3 Post-build/fly notes
You may or may not want to add this one as the 3rd and final entry for this one... Your choice!
1. Use collets on both sides of the wheels.
2. Paint after all gluing is done (last?) even though masking all the struts is hard work.
3. If you run short of "string", you can purchase more. This type seems to match well: 150# test, 12-strand+ braid, black fishing line. Or include a couple more yards in the kit?
4. 1/4' O.D., 1/8" I.D. black latex tubing can make a great finishing touch, glued to the cockpit openings. Nice and smooth black as opposed to the jagged-finish of the opening.
5. The tail dragger strut can be reinforced with wooden skewers inside the board before gluing the wooden "foot" in place. A ground loop can break the foam at the interface with the "fuse", (foam board part is fragile to shear-stress from side "loop" impact).
6. If you get a warp in the wing, all is not lost. I had one and I corrected it by using 2 wooden paint stirers, pinched on the trailing edge, last 2.5", of the main wing NOT touching the ailerons, and making a very slight "pseudo-flap" adjustment, up one side and down the other. Trim adjustment requirements will indicate what may be needed. The paint stirers put a nice straight seam/indent so it didn't look too shabby.
7. NOW GO FLY! IT'S A BLAST!!!

 Canadian Dollar


